- Home
- Easy Knitting Patterns
- Hat and Mittens
Knit A Hat And Mittens Set On Straight Knitting Needles
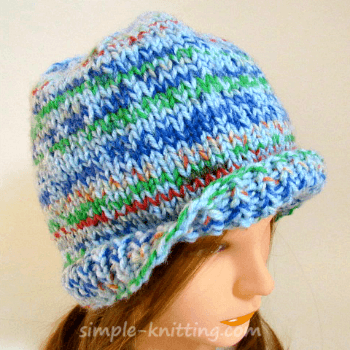
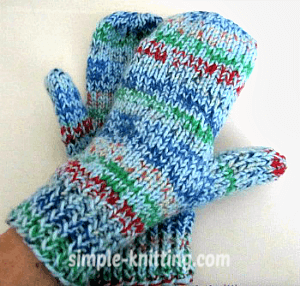
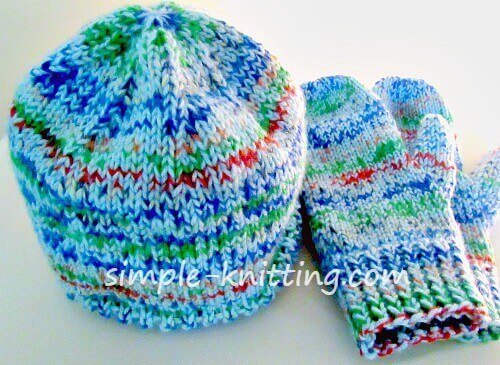
This super easy hat and mittens knitting pattern is fun to knit and just in time for holiday gift giving.
Or a lovely set for your family and friends. Better yet, knit it for yourself.
The simple hat pattern and simple mitten pattern are both knit on straight knitting needles.
Both patterns use basic knitting stitches throughout the pattern.
So it's fun and easy and pretty quick to knit and it's a great last minute gift idea.
All you need is some wonderfully soft yarn and you can start knitting.
This knitted set is one of those basic knitting patterns you can run too if you're looking for a simple knit.
And this hat mittens set will make a super knit for charity.
So if you're a fan of straight knitting needles, this straight needle hat pattern and straight needle mittens pattern are perfect for you.
The knit mittens ended up being just as fun to knit as the hat.
After all you can’t go wrong with some toasty mittens. And they’re great for making snowballs.
Knitting mittens is fun and this basic two needle pattern will help show
you how to knit them.
I just find that it's more fun to knit on straight knitting needles and knitting is all about having fun knitting the things you love.
You may notice that the hat and mittens pattern have a more decorative
ribbing stitch.
I decided to add a little eye candy to the ribbing.
I used a twisted rib stitch pattern instead of the usual 1 X 1 ribbing. I think it’s pretty, what do you think?
So let’s get started with the hat and mittens!
Here is the link to download my hat and mittens pattern
Hat and mittens knitting pattern details
Skills Required: Long tail cast on, knit, purl, k2tog, knit through back loop and,
Either the KFB increase (knit front and back) (see notes)
Or the M1L & M1R (make 1 left & make 1 right) (see notes)
Materials: Worsted weight (4) yarn – approx. 400 yards. I had some left over sock yarn so held both strands together.
The extra sock yarn is not necessary at all, it's just what I did.
Needles: Size US 7(4.5 mm) and US 8 (5.00mm)
Gauge: 4 sts and 6 rows = 1 inch
Knitting Abbreviations List For The Set
K, knit
P, purl
K2tog, knit two sts together
Ktbl, knit through back loop
Knit in front and back of stitch
M1R, make 1 right
M1L, make 1 left
Sizing: The hat will fit adult head size approximately (20 – 23 inches). Mittens will fit woman’s hand size between 7.5 and 9.5 inches.
I discovered that the hat and mitts will also fit a man because my friend Ted tried on both and they fit him perfectly.
Notes: I decided to give you a choice when you start increasing stitches for the thumb gusset.
You can use the quick and easy knit front and back method or choose the make 1 left and make 1 right.
They'll both work nicely and there’s knitting instructions for both increases. Just click on the links I provided.
knit hat on straight needles pattern

Using long tail cast on method and size 7 needles cast on 88 sts.
Work twisted ribbing stitch pattern for 1 inch as follows:
*Knit 1 through back loop, purl, repeat from * across row
Note: If you prefer to knit plain ribbing it's totally fine :)
Then switch to larger needles and continue in Stockinette stitch for 6 inches
So remember: Stockinette stitch knitting is knit 1 row, purl 1 row
Shape Crown
Row 1: * K9, k2tog, rep from * to last 11 sts, K7, k2tog, k2
Row 2: Purl on every other row
Row 3: *K8, k2tog, rep from * to last 10 sts, k6, k2tog, k2 (72 sts)
Row 5: *K7, k2tog, rep from * to last 9 sts, k5, k2tog, k2 (64 sts)
Row 7: *K6, k2tog, rep from * to last 8 sts, k4, k2tog, k2 (56 sts)
Row 9: *K5, k2tog, rep from * to last 7 sts, k3, k2tog, k2 (48 sts)
Row 11: *K4, k2tog, rep from * to last 6 sts, k2, k2tog, k2 (40 sts)
Row 13: *K3, k2tog, rep from * to last 5 sts, k1, k2tog, k2 (32 sts)
Row 15: *K2, k2tog, rep from * across row (24 sts)
Row 17: K2tog across row
Cut yarn leaving 8” tail and thread through yarn needle. Work needle through remaining sts and pull tightly and fasten.
I usually put needle through top sts twice to make sure it’s securely fastened.
Finish
Seam up back of hat and weave in ends.
knit mittens on straight needles pattern

Beginning at cuff and using size 7 needles, cast on 38 sts.
Work twisted ribbing pattern for 2 inches as follows:
*Knit 1 through back loop, purl 1, repeat from * across row.
Switch to size 8 needles and work Stockinette stitch for 10 rows.
Thumb Gusset
K18, place marker, increase one stitch in next 2 sts by using KFB, place marker, knit 18 sts
OR (ALTERNATE INCREASE METHOD)
If you prefer the M1L and M1R continue as follows:
K18, place marker, M1L, k2, M1R, place marker, knit 18 sts.
Purl next row and all alternate rows
Continue increasing within the markers on knit rows until there are 14 sts ending with a purl row.
Divide for Thumb
K18 sts, drop marker and knit 14 sts. Stop and place those (just knitted) 14 sts on a stitch holder or scrap piece of yarn.
Using the single cast on (thumb cast on), cast on 2 sts and then knit final 18 sts. (Note: The 2 sts you cast on make up for the two sts used in the thumb)
Continue working Stockinette stitch for approximately 4 inches or about 1 inch before the end of mitten.
Note: This is where you can choose the length you want.
Measurement from beginning of work is approximately 8 -9 inches or length desired
Shape Top
Row 1: K2, k2tog across row. (29 sts)
Row 2: Purl
Row 3: K2, k2tog, *k1, k2tog, repeat from * across row (20 sts)
Row 4: Purl
Row 5: K2tog across row (10 sts)
Cut yarn leaving about 12” tail and thread through yarn needle.
Run needle through remaining sts beginning at the opposite end of needle. Do this twice to fasten securely.
Thumb
Slip sts from holder and knit Stockinette stitch for 12 rows or approximately 2 inches ending with purl row.
Next Row: K2tog across row, cut yarn leaving 10” length and thread yarn through remaining sts.
Slip sts off needle and pull tightly to close up the thumb tip.
Finish
Seam up thumbs and fold mitten and seam up sides.
Happy Knitting!

