- Home
- Knitting Gauge
Knitting Gauge
Just What Is Gauge In Knitting?
Knitting gauge is the measurement of your knitted stitches and rows and it will tell you how loose or tight your stitches are.
It kind of sounds really complicated doesn't it? Well it really, really isn't and I'm going to try to help you understand it better.
Gauge in knitting is used to measure your knit stitches and then the rows of stitches that are created in a square of knitting.
The reason to check your gauge is to make sure you create a properly fitted garment like a sweater or even a hat for instance.
So what you'll do is measure your stitches and rows and apply those numbers to your size to find out how many stitches you'll need to cast on.
For example, when someone sews a dress or top they need to take measurements before they cut the material and sew the pieces together.
And it's the same kind of thing when it comes to knitting. The one good thing about knitting is that it's way more forgiving than sewing is. LOL
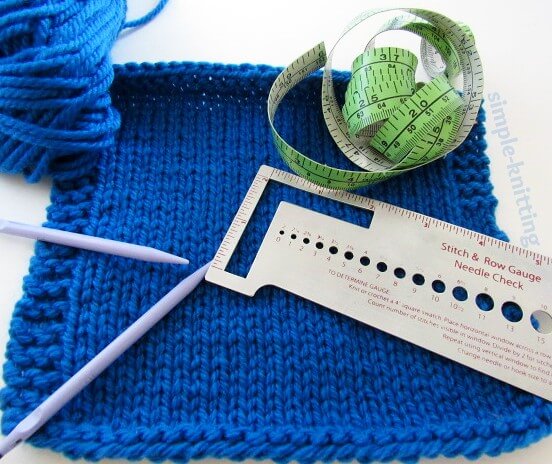
These are the tools for knitting gauge calculating.
And the holes you see in the middle of my stitch and row gauge are to figure out the size of your knitting needles if you need to.
Needles today come with the size marked on them but you may have older ones that don't.
So you just stick the needle into the hole and the needle needs to go right through. Then you read off the size and Bobs your uncle. haha
how do you measure your stitches and rows?
First you need to make a knitting gauge swatch or a square of knitting almost like the size of a small dishcloth.
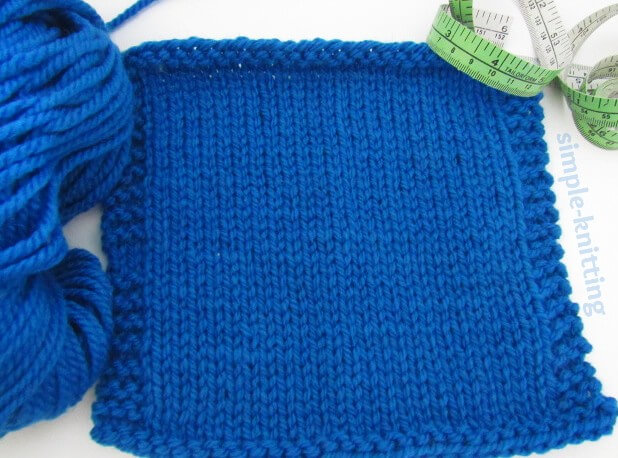 Knitting gauge swatch
You will knit the swatch with the same needles and yarn that you're going to use for your knitting project and also use the same stitch pattern.
So if you're knitting a sweater in Stockinette stitch you'll knit a square in Stockinette stitch that's about 4 X 4 inches around, just like the one above
Okay, my swatch is kind of extra big for show. :)
Once you're done knitting your swatch you'll simply use your stitch and row gauge to measure your knitting stitches.
You can make one like mine only maybe a little smaller but here's my golden standard knitting pattern for a gauge swatch
Knit A Gauge Swatch Pattern
The best way to knit a gauge swatch is to not repeat not add edge stitches like I did in my photos. I'm sorry, I didn't want a curled up hot mess of a swatch for my pictures.
I made my swatches big so that the gauge won't be affected by the garter edge.
Cast on 30 - 40 stitches
Row 1: Knit
Row 2: Purl
Continue in Stockinette stitch for 5 - 6 inches, cast off loosely and weave in yarn ends.
Next you should wash and dry it just like you wash and dry your clothes and then simply lay it out flat on a table ready for the next step....measuring it.
Okay are you all done now? Ready to learn how to measure knitting gauge? Yay, let's go! :)
I'm going to show you three very simple ways how to measure gauge in knitting and you can choose whichever one you like. Ready? :)
How To Measure gauge with a Gauge Ruler
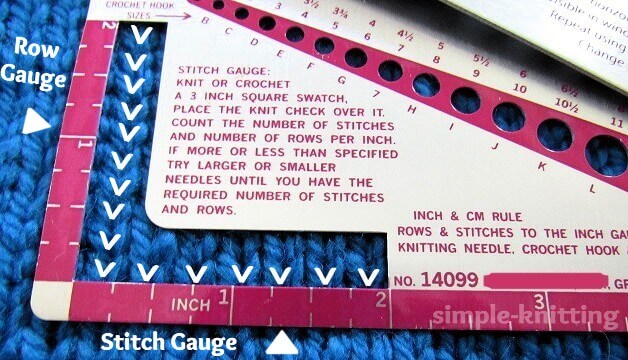
Simply place your gauge ruler on top of your knitting gauge swatch and line up the stitches in that L shaped slot just like below.
Line up all the stitches shaped like V's and make sure the ruler is placed so that the first V is right at the beginning of the stitch gauge.
Now what you need to do is count the V's. Each V is a stitch or a row.
 Calculating knitting gauge with a gauge ruler
In the photo above the 'L' shape slot is where you can count your stitches and rows over 2 inches.
You count the stitches, those V's going down for the rows and across for the sttiches.
So there are 10 rows in 2 inches and there are 7 stitches in 2 inches.
You may want to break that down even further. Most people like to figure the stitches and rows per inch so there are 3.5 stitches and 5 rows per inch
You'll want to make your swatch big enough so you can measure your stitches properly, usually about a 3 - 5 inch square of knitting.
The bigger the knitting gauge swatch the more accurate your gauge will be.
And try not to measure the edge stitches. They're usually a little funky.
another thought about knitting gauge
Now here's the thing and some people may get angry with me for this, but we all know that stitch and row gauge is important but....
The most important part of gauge is making sure that your stitch gauge is where it should be.
Stitch gauge is important for say a sweater to make sure it fits around the widest part of your body.
Row gauge on the other hand will typically be the length of, say a sweater and row gauge can be adjusted either shorter or longer quite easily.
Of course there are times in knitting that both gauges will be especially important but honestly? In everyday knitting? Hmm not always.
It's good to have a general idea of your row gauge but if it isn't in sync with the stitch gauge, say in a particular knitting pattern, don't stress about it
second way to measure gauge in knitting
#1 Pull out your knitting gauge swatch and lay it out on a flat surface. This one is striped so that you can see the stitches better.
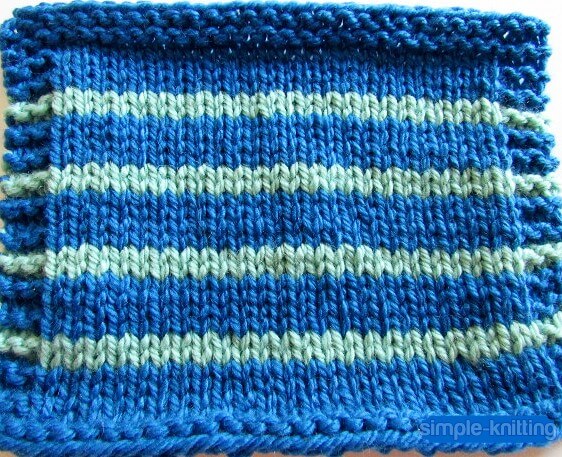 Simple striped knitting gauge swatch
#2 Grab your tape measure or ruler and measure out 4 inches on your swatch.
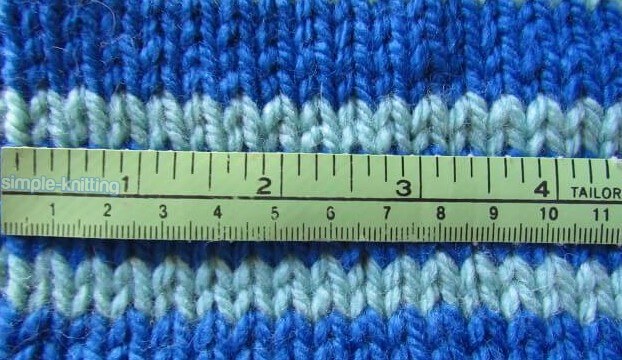 Calculating stitch gauge with tape measured to 4 inches
There we go, so you've measured out your 4 inches and now all you're going to do is count the stitches in those 4 inches.
#3 Let me help you out here so below I've added the V's to all the stitches in those 4 inches.
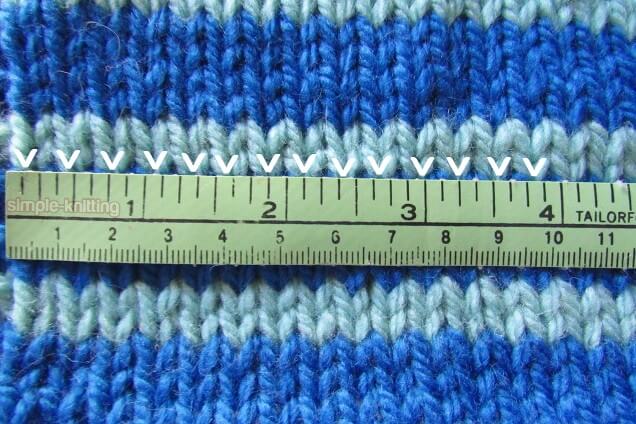
It amounts to 14 stitches over 4 inches. And to calculate the stitches per inch you'll just do some simple divishion.
14 stitches divided by 4 inches = 3.5 stitches per inch
Now you may noticed in the last photo that there's a tiny bit of the next stitch there. And it is noted however in this case it's really small and shouldn't affect the gauge.
I'll explain a little further down after calculating another way to get gauge.
You can also do the same for your row gauge as well. Here is a sample when I used the ruler part of my knitting gauge ruler
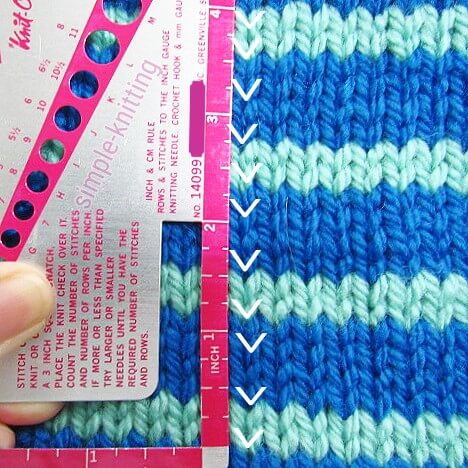 Calculating row gauge in 4 inches with ruler
I wanted to use the 4 inches to calculate my row gauge and I put in the V's on every other stitch but count all of them even in between the white V's.
Note: Make sure to line up the very first V to the beginning line on the ruler. The beginning line on my ruler above is where the red color begins.
third way to Measure knitting gauge when it's difficult to figure out the stitches
This should read how to measure gauge in knitting when it's impossible to pick out all the stitches in a highly textured pattern.
And yes there still is a way to figure it out and this will help you out a lot if and when the time comes.
Okay this method of calculating gauge in knitting is really important and I'll tell you why.
Sometimes you'll need to make a swatch with a heavily textured or detailed stitch pattern.
And the stitch pattern is so complicated you don't even know where to start calculating a knitting gauge so what do you do?
Make a swatch and more importantly without edge stitches. You'll notice I have a garter edge on my swatches? Don't do that. Why?
You don't want any stitches that will affect the stitch pattern, some stitches even Garter stitch pull as you can see on my swatches.
Note the amount of stitches you cast on and note how many rows you knit as well. This measuring can be done for rows too
Make a swatch that's at least 4 - 6 inches in width and length especially with this because it's so complicated and you want to be sure of your stitching.
Then block it by either wetting it or steaming it. Shape it out properly and let it dry on a blocking mat or towel.
Then go ahead and measure right from edge to edge. As an example only here's the idea. There's no counting stitches this way either
I know that the edge stitches can be a little funky here so make sure to be as careful as you can be with the edges.
At least this will give you an idea of you stitch gauge and row gauge if you choose to measure the rows too.
So my swatches are all 30 stitches with 3 stitches of garter stitch on each side. For this example pretend that the garter edge isn't there so there's 24 stitches below.
I've tape measured it out from edge to edge and it's exactly 6.5 inches in width.
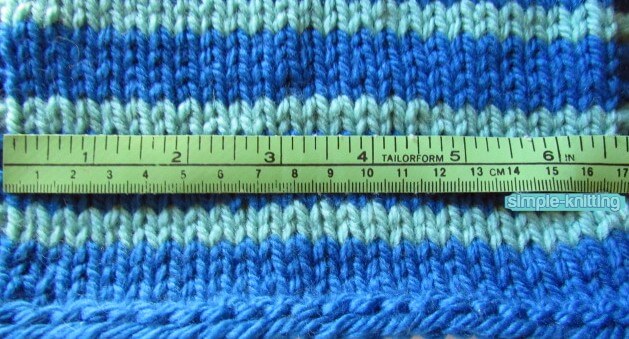 Measuring gauge without counting stitches, just a tape measure
Now all you need to do is simple math to figure out your stitch gauge. Again no counting stitches needed.
I have 24 stitches and the tape measures 6.5 inches in width. Divide 24 stitches by 6.5 inches = 3.692 stitches per inch.
Just as an aside remember when I mentioned that there was a tiny bit of space in my other calculations?
There is the little extra included in this one. It's not much but this is more precise.
You can still use the 3.5 stitches per inch or choose the 3.7 stitches per inch (rounded up). It won't make a huge difference but it's your decision.
So these are the three ways I use to calculate my gauge in knitting
What Does a Knitting Gauge Swatch Tell You?
Many things, you see a lot of things affect gauge like:
- Yarn weight, (the thickness) how thick it is when it's knitted
- Knitting needles (sizes and material of needle like wood, plastic, metal)
- Stitch patterns - ribbing for instance pulls in more like elastic when its knitted
- How tight or loose you knit
When you knit a gauge swatch you can find out a great deal about the yarn itself and also about how you knit, things like:
- If your yarn and needles match up to the gauge in your knitting pattern
- How well your stitch pattern shows up with the yarn you are using
- Whether the color combination you chose works well
- How tight or loose you knit. (This way you can adjust the needle size)
- How easy the yarn is to work with. Some yarns look beautiful but are very difficult to knit with
- A way to test and practice new stitches
- Give you inspiration and ideas
having trouble getting your gauge to match?
First of all you'll find that all knitting patterns will list a knitting gauge and it'll look something like this:
Gauge: 18 sts and 24 rows = 4 ins (10cm) with size 8 (5 mm) knitting needles in stockinette st.
Note: Knitting gauge is also listed to give you the freedom to choose another yarn.
But let's keep going here; maybe you found a lovely knitting pattern and you're having trouble matching the knitting gauge.
Don't worry. It happens all the time. Here are a couple of things to try.
If you have too many stitches then your gauge will be too tight. So go up a size in knitting needles.
And if you're still having trouble try a little bit thicker yarn so if you were working with worsted weight yarn try an aran weight.
It's a tiny bit thicker and might be just the ticket. You could even try another type of knitting needle.
So if you're using wooden needles maybe try metal. Sometimes this works too.
If you don't have enough stitches then your gauge will be too loose. So go down in needle size.
And if you're still having trouble try a tiny bit thinner yarn and the needle suggestion above.
Are There Projects That Don't Need Gauge?
Yes. You can find lots of things: wash cloths, blankets, some knitted bags, afghans and scarves don't necessarily need a gauge.
What do you do with all your gauge swatches?
1. A lot of people keep their swatches in a special reference box with a little tag on it describing the yarn, the gauge and needle size used.
2. You can save them all and start making a blanket by sewing all your swatches together.
3. You can also use your swatch as a mug rug or coaster as they call it.
4. If your swatches are big enough you can donate them to the Knit-A-Square charity or KAS as they call it. You can read more about this here
Knitting Video on how to make a gauge swatch
Hope this helps. Happy Knitting!
