- Home
- Easy Knitting Patterns
- Ascot Scarf Pattern
Ascot Scarf Pattern
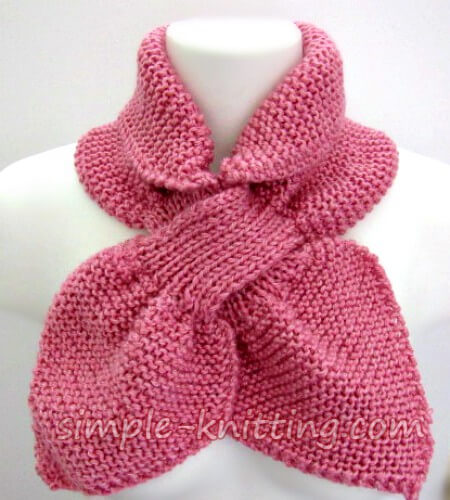
I've got a cute ascot scarf pattern for you to try. It's soft and cozy and fun to knit.
And it's a cozy garter stitch pattern that's quick to knit and takes one skein of yarn.
But hang on a sec...
ever wonder what Is an ascot scarf?
I never really knew myself so I think it's worthy of a short explanation.
Typically, an ascot scarf was an accessory used by men years ago. And it was used in place of a tie.
So they'd put on a collared shirt and then tie a silk scarf around their neck and tuck it into the shirt so it was a way to still look formal.
What's the difference between a scarf and an ascot? The ascots were tied very similar to the way a man's tie is folded leaving out one step.
You see if the tie is simply wrapped around the neck it becomes a scarf so the ascot was tied similar to a regular tie.
So that's the short version of what an ascot is and now we all know. I had to share that .....let's continue
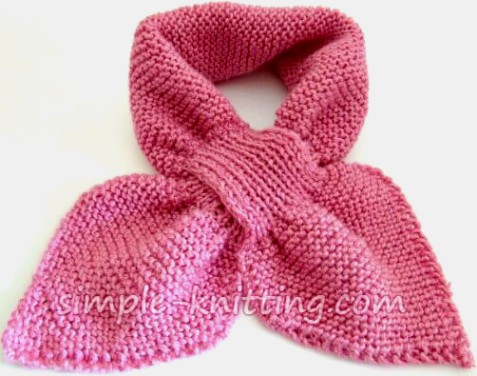
My knitted ascot scarf is a stay-in-place scarf that's super soft and cozy and easy to knit.
It's the perfect accessory to keep you warm on those chilly mornings. In fact this is a nice way to ease into some Fall knitting.
If you want to stay warm choose a nice cozy yarn especially for those chilly mornings or office settings.
Or you can knit an ascot scarf with lighter yarns like bamboo or cotton making it suitable for spring and summer. It's up to you.
What's neat about the ascot scarf is that you can wear it as an accessory with your outfit too.
The difference with my ascot scarf pattern is the keyhole is at both ends and it's much smaller and quicker to knit.
I love knitting scarves that will stay in place and this works perfectly just like my keyhole scarf pattern.
I do love both designs. And they're both fun to knit.
I love smaller quick knitting projects for those last minute gifts and they're nice and portable to you can toss it in your bag and knit on the go.
The ascot scarf pattern is simple to make and you'll learn a new way to knit a keyhole. It's fun and you can add it to your list of knitting skills.
And the ascot scarf pattern is very versatile so you can easily change the size, width, stitch pattern, yarn and so on to create you're very own keyhole scarf.
All it needs is your imagination and some great knitting yarn.
Or you can leave it just the way it is. It's so pretty in simple Garter stitch.
So let's get started..
Ascot Scarf Pattern Details
Skills Required: Cast on, knit, purl, K2tog (knit 2 sts together), slipping stitches to a holder, KFB (knit front and back)
Needles: Size US 9 (5.5 mm)
Yarn: Medium worsted weight. I used 1 skein Lion Brand Heartland
Gauge: Not important
Dimensions: From tip to tip it's 34 inches long. Scarf part is 7 inches wide and the length between the keyholes is 16 inches.
Abbreviations: K, k = knit, KFB, kfb = knit front back, K2tog = knit 2 stitches together, sts = stitches
Notes: The easy scarf is very versatile to knit. You can make it bigger or smaller simply by adjusting the amount of stitches you want.
I am including links to the K2tog decrease and the KFB so you can review them if you feel you need too.
Tip: Make sure that you use an even number of stitches if you decide to adjust the width.
You can also adjust the keyhole loop in length to whatever you like.
Tip: Count the rows as you knit the bow so that both ends will be the same size.
Especially after you're finished with the increases. How many plain rows did you knit? Jot it down for later.
Click on the link to download ascot scarf pattern
Ascot Scarf Pattern
Cast on 2 stitches
Row 1: KFB, knit to end of row
Repeat row 1 until you have 32 stitches
Continue to knit garter stitch until you reach 6 inches (this is where you need to count the rows you knit)
knitting the keyhole (loop)
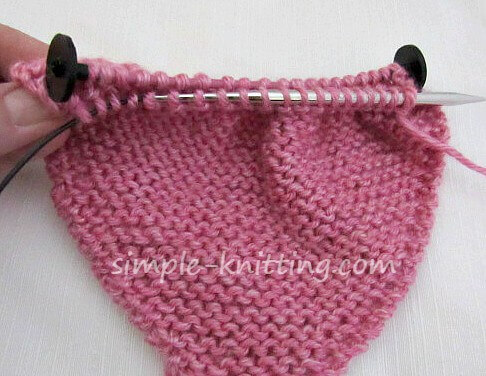
*K1, slip next stitch to holder, repeat from * across row
You should have 16 stitches on your needle and 16 stitches on holder.
This is what it should look like.
 Forming The Keyhole
I like to use a small cable from my interchangeable needle set as a holder so I can attach a needle to it when I'm ready to use the sts.
With stitches on needle, K1, P1 rib for 16 rows and then place these sts on holder.
Attach yarn to sts on other holder and repeat the ribbing as before.
Joining both pieces of the loop
Here's a little explanation before you start.
You're going to be knitting 1 stitch from the needle and 1 stitch from the holder to integrate the stitches back together and close the loop.
So place the sts from the holder onto a spare needle. You have 16 sts on one needle and 16 on the other (the needle with the working yarn attached).
This is how I set myself up. The stitches on the green needle were on the holder.
Plus my working stitches on other needle with working yarn. There should be 16 stitches on both needles.
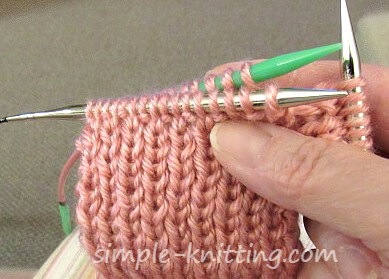
Begin by knitting 1 stitch from the needle that's attached to the yarn, then knit 1 stitch from the stitches that were on the holder.
Keep alternating back and forth until all stitches are on one needle again and you're done.
There should be 32 stitches altogether. And the loop is now closed up.
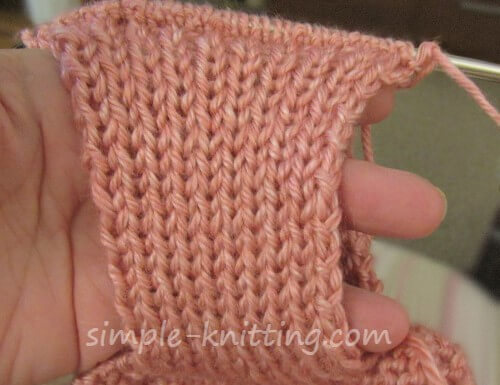 Here's the keyhole
Knitting the scarf section
Continue working in garter stitch (knit every row) to the length you want. I made mine 16 inches long.
The best way to do this is try it around your neck to see how you like it.
When you have the length you want you're going to repeat the process for the 2nd loop.
Please refer to the top section to make the 'Keyhole Loop' and make another loop.
Knit garter stitch for the amount of rows you counted after you made the increases on your first bow. I believe I knit about 22 rows on mine.
To Shape The point
K 1, K2tog, knit to end of row.
Repeat above row until you have 2 sts on needle.
K2tog
Pull yarn through last stitch and you're done.
Weave in ends and enjoy!
