- Home
- Knitting Stitch Patterns
- Stockinette Stitch
How to Knit Stockinette Stitch
The Stockinette Stitch pattern is one of the first stitch patterns you'll learn how to knit.
When I first learned to knit I learned Garter stitch first and then stocking stitch. These are the basis for all other stitches you'll learn.
It's also called stocking stitch by the way depending where you live in the world.
The abbreviations for it is - St St
In fact stocking stitch isn't even explained very much in patterns. It's such a basic stitch pattern I guess it's assumed you'll know how to knit it.
Well this timeless stitch pattern deserves some explanations so let's read on.
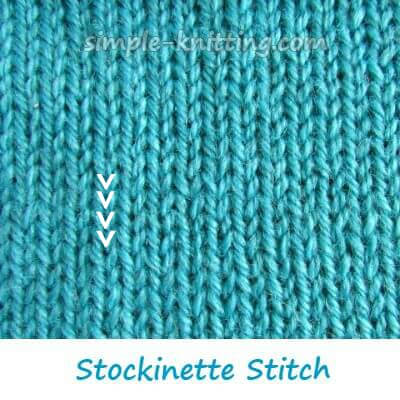
This is the knit side. See how it creates a nice smooth surface and you can easily see the knit stitches.
And notice the smooth side creates little V's? I outlined them to show you how well defined they are. Those are knit stitches.
When you turn the stockinette stitch pattern over you will see lots of purl bumps
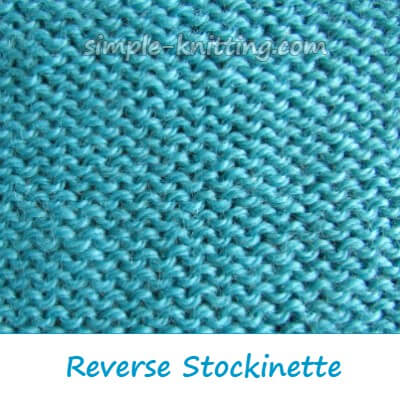
This is the purl side. On some knitting projects this could be the wrong side of your work.
However...
This is also called Reverse Stockinette stitch and is a knitting stitch pattern too.
In fact, you can use either side of Stocking stitch depending on your design.
You'll find many sweater patterns that use it and other knitting projects too.
So let's get this straight...
- When you knit stocking stitch the knit side is the right side of the work and the purl side is the wrong side and
- When you knit reverse stockinette the purl side is the right side and the knit side is the wrong side.
Knitting Stockinette Stitch
Worked on any number of stitches, stocking stitch is simple and easy to use for many knitting projects.
So you can use an even or odd number of stitches, it doesn't matter.
Stocking stitch is formed by knitting one row and purling one row. This is how it will look in the knitting pattern:
Row 1: Knit across row
Row 2: Purl across row
Repeat row 1 and 2 for the pattern
Stockinette Stitch Curls
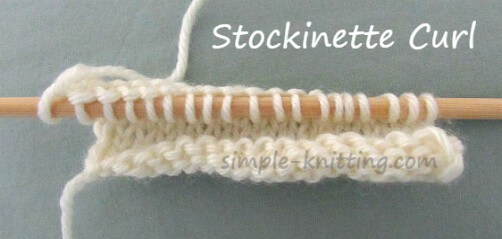
And it's not your fault! You aren't doing anything wrong.
Basically it curls because there's a difference between the size of the knit stitch and the size of the purl stitch.
Knit stitches are a little shorter and narrower than purl stitches. So on the knit side of stocking stitch the knit stitches are wider than on the purl side.
And on the purl side the purl stitches are longer than they are on the knit side.
What happens is the knit side pushes out horizontally while the purl side pushes out vertically. So you get the curling.
Taming The Stockinette Curl
Taming The Curl #1
One way is to knit a border in a different stitch pattern like garter stitch or possibly ribbing, moss or seed stitch. This will help keep it flat.
Be prepared to knit between 5 and 10 stitches on each side and 5 - 10 rows at the beginning and end of your knitting project.
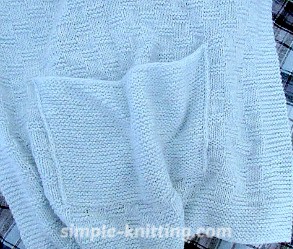
If you take a look at my knit shawl pattern you'll notice that I used a garter stitch border along the sides and both ends.
And I understand it's a little tough to see but I put a garter stitch border all around my shawl.
It was starting to curl and I didn't want that so decided to include a border to stop the Stockinette Stitch curl.
Taming The Curl #2
Another option is to knit stockinette in the round. This can work for some knitting projects and may be worth a try.
When you knit in the round stocking stitch is formed by knitting every round.
Here's an example, I wanted to make a knit scarf pattern in stocking stitch only without a border, just a simple knit scarf.
So I decided to knit a scarf in the round and even added stripes. Best of all it's in stocking stitch and I love it!
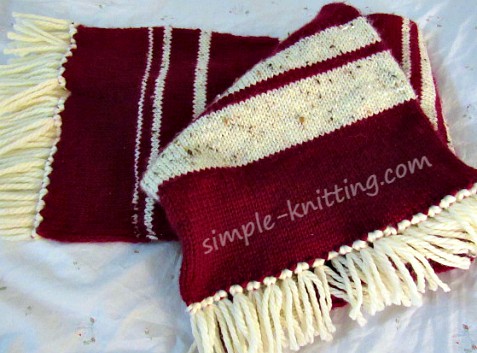
What you do is simply knit in the round to the length you like and bind off.
Then you flatten the scarf (after all it's a tube) and add a scarf fringe to it to close the ends.
You don't even need to seam the ends but simply add fringe to close it. This is my favorite knit scarf of all times. And I promise to get the pattern up soon.
Taming The Curl #3
One final suggestion which works well for blankets and skirts is to add a fabric backing.
This isn't always an option but is nice for certain knitting projects and works quite well.
So you have three suggestions for taming the curl. And the most popular is probably #1, adding a border.
This way you can add some spice to your knitting project simply by adding an attractive border to it and it'll stay flat.
At the same time do keep the other two in mind when you plan your next knitting project.
Happy Knitting!
