- Home
- Knitting Stitch Patterns
- Diagonal Rib Stitch
Diagonal Rib Stitch
The diagonal rib stitch is another version of a rib stitch pattern that creates lovely slanted textured stitches.
By the way my friends are you looking for Norma's Knitted Twisted Headband knit in the diagonal rib pattern? click here, it's just below.
And if you're interested in the diagonal rib knitting stitch pattern read on and I'll tell you all about it.
So what is a diagonal rib?
It's a rib stitch pattern where each row of the pattern moves the stitches ever so slightly to create the diagonal look. It's fun and easy.
It doesn't pull inwards like a 2X2 rib stitch pattern but it does create an open textured ribbing that's really lovely.
The nice thing is that it's also reversible so on one side the stitches will slant to the right and on the other side they'll slant to the left.
Just pick your favorite side and go with it.
Just look how those simple rib stitches create the diagonal pattern just by moving the stitches over ever so slightly.
Rib stitch patterns are very versatile even this diagonal ribbing stitch pattern so you'll see many versions of it.
What can i make with the diagonal rib stitch?
Since it's reversible I always like to think of reversible things to knit first like scarves, blankets and shawls but don't stop there.
It will also look great on many other knit items like hats, and even headbands like the one below plus neck scarves and cowls. The choices are endless.
Some great features of the diagonal rib stitch
- Lays flat
- It's reversible, the stitches on the reverse side will slant in the opposite direction that's all
- It's made with knit and purl stitches so it's great pattern for beginners
- It doesn't pull in (snug up) like regular rib stitch patterns
- 8 row repeat
- It also creates lovely textured knitting stitches
- Can be used as an allover pattern
The nice thing is that it lays flat and spreads out also.
Make sure to knit up a swatch though so you'll have an idea how it will look.
To download the diagonal rib stitch pattern click here
Diagonal Rib Stitch Knit Flat on straight knitting needles
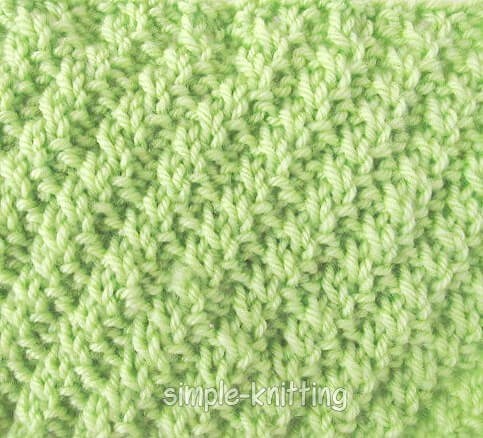 Diagonal Rib Stitch
The diagonal rib stitch is worked over a multiple of 4 stitches.
If you'd like to knit a sample cast on 12, 16, 20 or 24 stitches.
Row 1 (right side): *Knit 2, Purl 2; repeat from * to end of row.
Row 2: * K2, P2 to end of row
Row 3: * K1, P2, K1, repeat from * across the row
Row 4: * P1, K2, P1, repeat from * across the row
Row 5: * P2, K2, repeat from * across the row
Row 6: * P2, K2, repeat from * across row
Row 7: * P1, K2, P1, repeat from * across row
Row 8: * K1, P2, K1, repeat from * across row
Knitting rows 1 - 8 creates this pretty pattern.
To continue simply begin with row 1 again and work through each row.
Diagonal Rib Stitch Knit In the round pattern
You will still need to work the pattern in multiples of 4 stitches
Round 1: K2, P2 right around
Round 2: K2, P2 right around
Round 3: * K1, P2, K1, repeat from * around
Round 4: * K1, P2, K1, repeat from * around
Round 5: P2, K2 around the row
Round 6: P2, K2 around the row
Round 7: * P1, K2, P1, repeat from * around
Round 8: Row 8: * P1, K2, P1, repeat from * around
Keep working through the 8 rows until you reach your desired length
Want to try the diagonal rib Stitch on a real knitting pattern?
Great! I made one just for you. Hope you like it.
Norma's Knitted Twisted Headband
This is a very easy knitted twisted headband using the diagonal rib stitch.
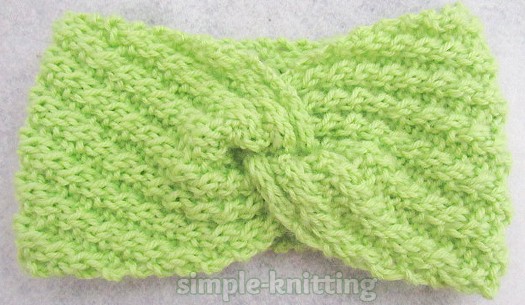 Norma's Knitted Twisted Headband
I wanted you to be able to have a knitting pattern to go with the stitch pattern so here it is.
Materials: Light Worsted Weight Yarn. I used Cascade 220 Superwash between 125 – 150 yards.
Needles: US 8 (5mm)
Gauge: 5.33 stitches = 1 inch
Size: Headband is 4.5 inches wide and knit to a length of 19 inches. Headband needs to be snug so it should be at least 2 inches smaller than circumference of your head.
Wondering how to measure your head?
No problem I have all the details for you on my hat knitting tips page so check it out if you need help.
Link to download my diagonal rib stitch knitted twisted headband
norma's knitted twisted headband pattern
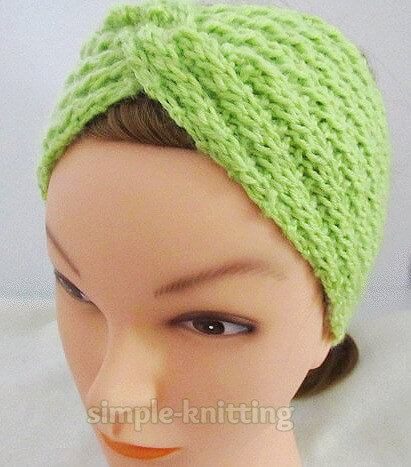 Norma's Knitted Twisted Headband
Cast on 26 stitches
Row 1 (right side): K1, *Knit 2, Purl 2; repeat from * to last stitch, K1
Row 2: K1, * K2, P2 to last stitch, K1
Row 3: K1, * K1, P2, K1, repeat from * to last stitch, K1
Row 4: K1, * P1, K2, P1, repeat from * to last stitch, K1
Row 5: K1, * P2, K2, repeat from * to last stitch, K1
Row 6: K1* P2, K2, repeat from * to last stitch, K1
Row 7: K1, * P1, K2, P1, repeat from * to last stitch, K1
Row 8: K1, * K1, P2, K1, repeat from * to last stitch, K1
Repeat the 8 rows to desired length and bind off in pattern. I'd bind off on either row 2 or row 6 but I don't think it will matter too much.
Wondering how to make the twist in a knitted twisted headband?
1. Lay your headband out flat and then fold it lengthwise like this..
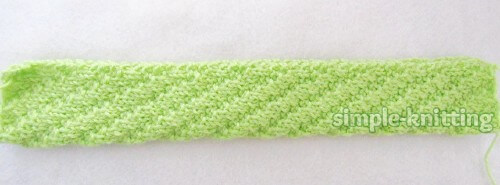
2. Take each end in your hands and open the folds a little.
You are going to sandwich the ends into each other and it'll feel a little awkward but go ahead, you can do it, and it should like this...
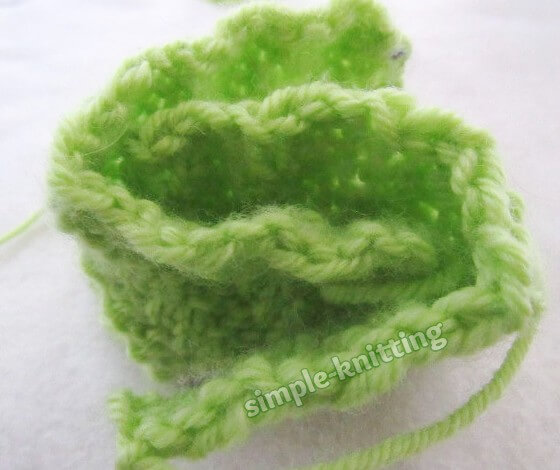
3. Now all you do is thread your tapestry needle with the yarn end and stitch all the layers together like this...
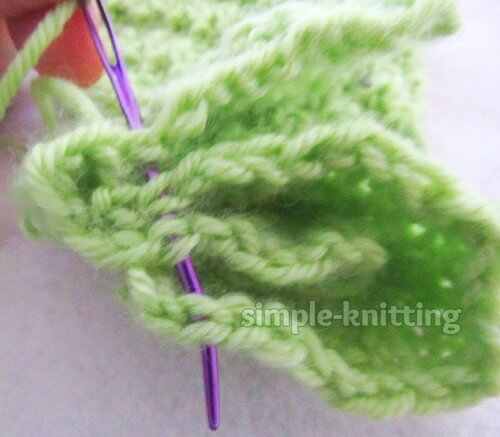
Make sure to go through each layer of the edge stitches that look like 'V's' and go right over to the end
Next you simply weave in all the ends and unfold your fresh new knitted twisted headband.

Now you can enjoy your new headband using the diagonal rib stitch.
Happy Knitting!
