- Home
- Knitting Instructions
- Mattress Stitch
Mattress stitch step by step
How To Seam Knitting
Mattress stitch is a great seaming technique to use for sewing knitted seams together.
If it's done just right the seams will be invisible.
One of the most important things to learn in knitting is how to seam knitting.
After all, you've spent hours, days, weeks and maybe even months knitting up something wonderful and it can be ruined so easily if it isn't sewn up properly.
And the mattress stitch is very easy to learn. It's best known for sewing vertical seams like the sides of a sweater. But you can use it wherever you think it will work.
Seaming Knitting Tips
1. If you know ahead of time that you will be sewing your knitting you can leave a long enough tail so that you can use it. It will save you from weaving in another yarn end
2. Try using the same yarn you knit your pieces with. If it's really thick you might want to either find a yarn a bit thinner that comes close to the same color you used.
Or you may want to try some embroidery thread. Embroidery thread comes in many different colors so you're sure to find one that matches.
3. Use a length of yarn no more than about 16 inches long. It does get worn from the sewing after awhile.
I have lots of pictures to help you. After all it may only take that one extra picture for you to completely understand how to work the mattress stitch.

As always I'm using a contrasting yarn so that you can see what I'm doing.
Mattress Stitch Step-By-Step Instructions

If you take a look at your knitting (above), these are the edge stitches, sometimes called the selvedge edge. Lots of times it is kind of messy but no worries, it will all be sewn up and no one will see it.

1. Lay your two knitted pieces out with the right side facing you just like the photo.

2. What you want to do is gently separate the edge stitches from the knitting stitches beside it. See in the photo. Those bars are what you will be using to mattress stitch seaming your pieces together.
Okay let's get started knitting seams together...


3. Thread your yarn needle and push it through the very last stitch on one piece of fabric (above left photo)
If you'd like to keep it in place push it through the same loop again (right photo) to kind of tie it so it won't move around. (I don't usually do this but you may like too).

4. Next, move over to the other knitted piece and push the yarn needle through the very last stitch just like the first.
You don't need to tighten the pieces yet, just keep it pretty loose like in my photo. You'll see why in a bit.


5. Sometimes you may find that when you start to sew your knitted piece you have one lonely bar at the beginning of your seaming. If you do see one bar you can put your yarn needle through that one bar.
Just keep in mind that whatever you do on one side of your knitting needs to be done the same on the other side to keep them even.


6. So move over to the other side and push your yarn needle through that one bar as well (above left photo). Bring the yarn through.
This will keep it even with the other side
Some knitters like to go through one bar all the way up their knitting and others go through 2 bars. It's just a matter of preference. I like going through 2 bars so from now on I will be going through 2.

7. Now move over to the other piece of fabric. Always go back to the same place you came out of previously.


8. Push your yarn needle through those next 2 bars. And bring the yarn through.


9. Move over to your other piece and go into the same place you came out of before (above left photo), pushing your needle through those next 2 bars and pull yarn through (right photo).
Keep on mattress seam knitting back and forth for about an inch and then stop a minute.
Here's the magic moment.


10. Take your yarn and firmly pull on it to bring your knitted pieces together. Try not to pull too tightly but if you do just stretch it back into shape.
Isn't that cool? You can't even really see the red yarn. I just love the mattress stitch.


11. Now just continue seaming up your knitting going from one side to the other side. Every inch to inch and a half pull on your yarn to bring the pieces together.

12. Keep on knitting seams together all the way up to the top. And pull on the yarn to bring the pieces together.

13. Here's what I do at the top. I put my yarn needle through the loop on the other piece like in the photo. Tighten it up a bit.


14. Then just bring the needle through the loop to kind of knot it and pull. Now you can weave that end in as well.

There ta-da. Looks really good doesn't it? You can't even see the red yarn. Oh I know that my poor swatch is stretched but even still it looks pretty cool.
When you actually work the mattress stitch on your knitting it will look excellent and you won't even see the seam.

And this is what it looks like on the wrong side. I know it is quite a big looking seam right? It's OK you won't notice it and it's not noticeable or uncomfortable at all. Best thing is, it hides the ugly edge stitches.
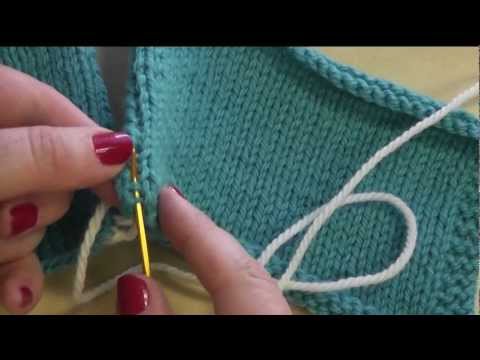
For those of you who prefer watching I found a great mattress stitch knitting video.
Grab a cup of tea and have a look.
Mattress Stitch Knitting Video
Happy Knitting!

Like This Page? Please Share it
I am a participant in the Amazon Services LLC Associates Program, an affiliate advertising program designed to provide a means for sites to earn fees by advertising and linking to Amazon.com and affiliated sites. If you make a purchase through one of my links I may receive a small commission. This will not affect the purchase price and you will not pay more when you buy through my link.
Copyright © 2011 - 2026 by Vickie Danielsen All Rights Reserved
Please don't copy the content of this site. It is Copyscape protected
