- Home
- Easy Knitting Patterns
- Knit Cowl Pattern
Marina Knit Cowl Pattern
Cowl Knit On Straight Knitting Needles
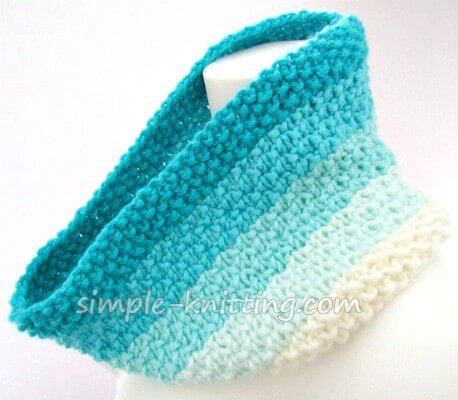
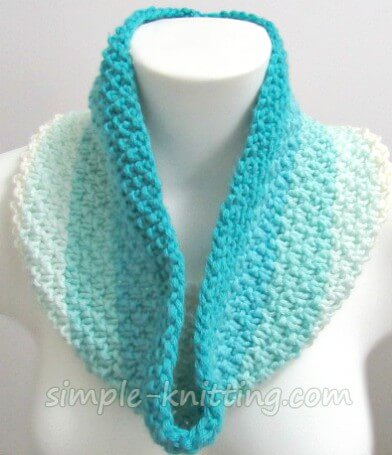
Today I want to share with you my Marina Knit Cowl Pattern knit on straight knitting needles.
It's something light and bright for those cold, dark and cloudy days.
This is an easy knit pattern just in time for the Fall season or for gift giving.
If you noticed my titles at the top of the page you might be asking me right now....
Can you knit a cowl on straight Needles? Really?
Yes you can, absolutely and the Marina knit cowl pattern is an example of straight needle knitting.
Just because a cowl is shaped in a circle it doesn't mean you have to use circular knitting needles to make it.
You can simply knit it to your desired length and then bind off. Or you can cast on the length you want and knit the width you want.
You have a couple of options. With knitting there's always options!
When you finish knitting your cowl all you will do is seam the ends together and you have your circle cowl or if it's long enough you're knitted snood.
So again, please know that you can knit a cowl on straight knitting needles. It's super easy to do and it's fun too.
The trim on this knit cowl patterns is made with the seed stitch pattern and the body of the cowl pattern is made with the lovely dot stitch pattern.
It knits up quite fast too, a couple of evenings and you'll have it finished or if you're a fast knitter it may only take you one evening to make it.
It's also a nice, easy knitting idea for gifts too, with the holidays just around the corner. And this is an easy knit to make.
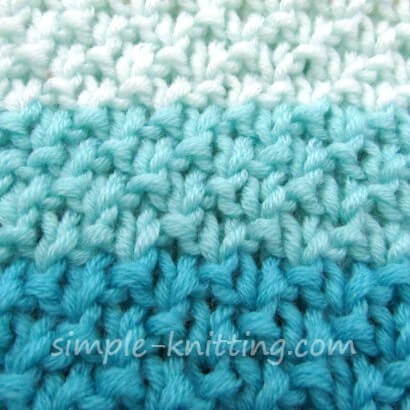
This is an up close look at the dot stitch pattern I used. I just love those textured stitches.
 Dot Stitch Pattern Used On My Cowl Pattern
And it's really simple to knit and also to incorporate into any pattern.
So How Much Yarn Do You Need To Knit A Cowl?
It depends on the yarn you use to make it.
For my cowl pattern I used 127 yards (116m) of bulky (5) yarn. There was only a tiny bit left.
What Is A Good Length For A Knitted Cowl?
So for a cowl that you simply put on and don't wrap around your neck I'd aim for somewhere between 20 and 24 inches.
You can knit a cowl any length you want. All you have to do is take a measuring tape and wrap it around your neck letting it drape down.
Then just choose the length you'd like it to be. If you knit it long enough you can drape it around your neck a couple of times.
Maybe you're interested in having a cowl that's right up against your neck like a turtle neck type.
For instance, when I knit my neck warmer all I could think about was keeping warm so I just wanted it right up against my neck.
Plus I wanted to use it to keep my ears warm too if I needed to. I didn't want anything to fiddle with so the neck warmer was the way to go.
How Many Stitches Should I Cast On For A Cowl?
It depends on what yarn you use and what the knitting gauge is.
For my knit cowl with bulky yarn (5), I cast on 86 stitches for the circumference of my cowl to be about 26 inches
If I was using a thinner yarn I would have added a lot more stitches to cast on.
It comes down to knowing what your knitting gauge is first and then it's really easy to figure out how many stitches you'll need for a cowl scarf.
Here's an example. Say you like the length at 24 inches. Figure out what your knitting gauge is and let's say you have 4 stitches per inch.
You'll multiply 24 inches X 4 = 96 and 96 stitches is what you'll cast on for your cowl. Easy peasy right?
So let's start knitting this knit cowl pattern and I hope you enjoy it.
Marina Knit Cowl Pattern Details

Skills Required: Knit, purl, cast on, bind off, joining yarn
Gauge: 3.25 sts and 5 rows = 1 inch Gauge isn't too important if you use another bulky yarn.
Materials: Bulky (5) yarn approximately 127 yds (116m)
Needles: Size US 11 (8mm)
Dimensions: Approximately 6.5 inches in height and 26 inches in circumference
Abbreviations: K, k = knit, P, p = purl, rep = repeat
Notes: I used two stitch patterns for the Marina Cowl, seed stitch pattern and dot stitch.
You can use any color yarn you'd like, self-striping and even variegated would look lovely and so would one color.
The seed stitch pattern and the dot stitch will both stand out and look pretty!
I also added two extra stitches in order to create a selvage edge. It'll make it easier to seam the ends together.
Click here to download my knit cowl pattern
Marina Knit Cowl Pattern Instructions
Cast on 86 sts using the long tail cast on or your preferred cast on.
Work 7 rows of Seed stitch. For seed stitch knit as follows:
Row 1: K1, *k1, p1, rep from * to last stitch, knit 1
Row 2: K1, *p1, k1, rep from * to last stitch, knit 1
Now proceed in the following dot stitch pattern for about 5.5 inches or desired height.
Row 1: Knit
Row 2: K1, *K1, P1, repeat from * to last stitch, K1
Row 3: Knit
Row 4: K1, *P1, K1, repeat from * to last stitch K1
Continue knitting in pattern until you reach 1 inch before the top and ending on row 2 or 4.
Your work should measure about 5.5 inches or your desired height
Next Row: Knit across row.
Then proceed in seed stitch for 6 rows.
Bind off very loosely.
Finish: Weave in ends and seam ends together. Then simply enjoy!

