- Home
- Knitting Instructions
- Increasing Stitches
increasing stitches in knitting
How to Increase Knit Stitches
Increasing stitches in knitting simply means that you need to add an extra stitch or stitches to your knitting.
So you've been practicing knitting and purling for awhile now and you want to learn how to increase a stitch in knitting.
Well great news! It's really easy to do.
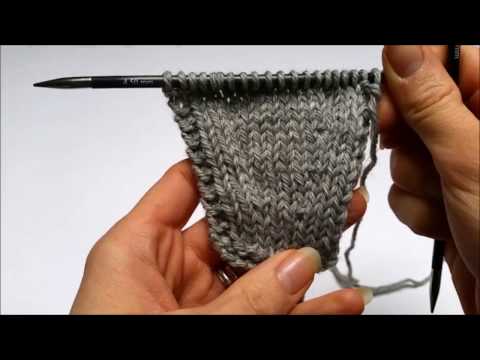
Increasing knitting stitches is known as shaping your knitting and you'll be making the fabric wider.
An example is when you knit a sleeve for a sweater.
Your upper arm is wider than your lower arm and wrist area so you will gradually start increasing stitches as you knit up the sleeve.
I'm going to show you the basic knit increase called knit front and back (KFB), also called the bar increase.
They call it a bar increase because it leaves a little bar in your knitting.
It's not that noticeable and sometimes it's used as an embellishment such as shoulder increases on a sweater. It looks quite nice.
There's also another increase in knitting technique called the knit front slip back (KFSB).
I've added a knitting video demonstrating this newish addition to increasing stitches. It's been about 4 years now that's why it's still kind of new.
The knit front slip back gets rid of the little bar that's associated with the standard knit front and back so you may like to try both.
They're both very easy to do and it's always nice to have some choices.
So let's get started...
Increasing Stitches Knitwise (KFB)
By knitting increases this way you will be making two stitches out of one.
The first part is just the knit stitch but let's go through it again.
Photos are on top with instructions just below and always view from left to right
 |
 |
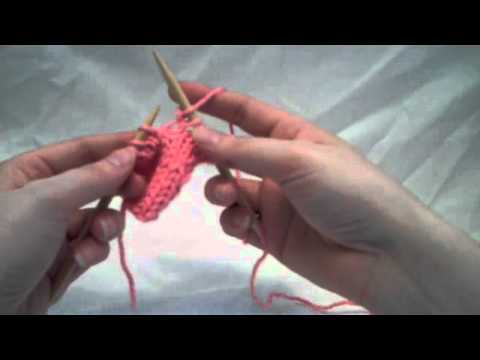
1. With your right needle push through the first stitch on your left needle from front to back. Then take your working yarn (ball end) and wrap it around right needle.
 |
 |
2. Then bring it through the stitch on the left needle just like the picture on left. The new knit stitch is now on the right needle.(Right photo)
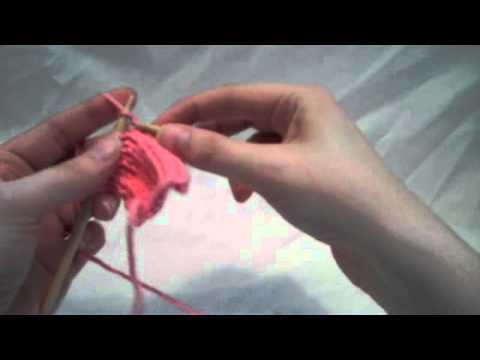
And this is where it changes a bit in order to work the increase. Don't drop the loop off the left needle.

3. With your right needle go into back of stitch on left needle, the one that you didn't drop off the needle. Then simply knit it just like you would the knit stitch
 |
 |
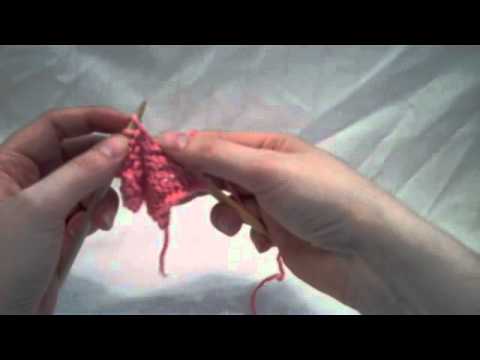
4. With yarn wrapped around right needle simply knit the stitch from back of needle, and bring through loop completely so that it's on the right needle. And there you go. Pretty great isn't it?
Now you know to KFB knitting or knit front, back in knitting
Knit Front Back (KFB) Knitting Video - English Method
Knit Front Back (KFB) Video - Continental Method
How to increase a purl stitch - PFB knitting
Most knitting increases are worked on the right side (knit side) which means that you would make a knit increase.
Sometimes though, when you're working on a knitting pattern you will come across instructions for a purl stitch increase.
It doesn't happen too often but you will need to know how to do it. It is a little trickier to work but it can be done.
Basically what you will be doing is the purl stitch but you won't drop the loop off your left needle.
Rather, you will work a purl stitch in the back of the same loop.
It's just like the knit front and back only this is the purl front and back.
Here's how to do it.. Get your fingers ready.
 |
 |
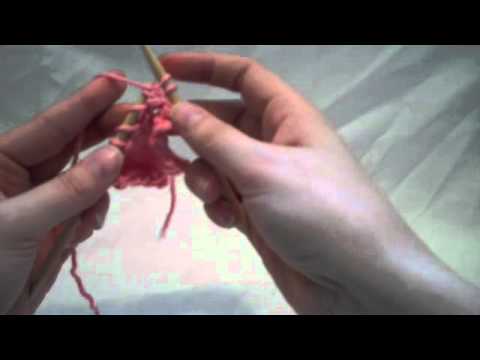
1. The beginning starts off with the purl stitch so make sure your yarn is in the front of your work.
With your right needle insert it into the first loop on the left needle just like purling.
 |
 |
2. Bring yarn around right needle counterclockwise, snug it up a bit.

3. With right needle and the yarn still wrapped, bring it through loop on left needle. Up to this point you have just done a purl stitch. Let's keep going here...

4. Do not drop the loop (stitch) from your left needle. You will now work into the back of that loop to create a purlwise increase.
This is the tricky part and I tried very hard to make the picture as clear as possible so that you can understand. Make sure your working yarn is still in the front of your work.

5. In this picture I moved my left needle around because you have to insert the right needle in the stitch on the left needle from the outside.
See how I am doing it in the picture? I know this is tricky but you can do it.
 |
 |
6. See how in this photo on the left the stitch is twisted? Don't worry its supposed to be like that. Bring working yarn around right needle counterclockwise.

7. Bring your right needle with the yarn wrapped around it through back of stitch on left needle. See how my right needle is going through the stitch kind of backwards on the left needle? Just keep bringing the needle through.
 |
 |
8. There you go. You can now drop the loop from the left needle.

9. There it is. The right needle has your new purl increase stitch
Purl Front Back (PFB) Video - English Method
Purl Front Back (PFB) Video - Continental Method
Increasing stitches isn't so difficult is it? Now you know how to do basic knitting increases and purl increases.
Different Increase In Knitting
Someone discovered an alternative to the Knit Front Back (KFB) and I just have to share it with all of you.
It's called Knit Front Slip Back. The new way to increase stitches in knitting is similar to the KFB but removes the bar and it does look smoother too.
Isn't knitting amazing? It's constantly changing and new ways are being found to make knitting stitches even more fun.
Knit Front Slip Back Increase In Knitting Video
Increasing stitches isn't so difficult right?
And now you're well on the way to knowing the basic knitting increases and purl increases plus this wonderful increase alternative.
Knitting Increases Evenly Across a Row
Your knitting pattern says to increase stitches evenly across a row. What do they mean exactly?
A lot of times in sweater patterns for instance, after you have worked the ribbing, you will often see that you have to increase more stitches for the body of the sweater.
And the increases are usually done at evenly spaced intervals across the row.
So how do you knit increases evenly across your row?
I struggle with this all the time. But not anymore. I found a great place called WorldKnits where you'll find a math knitting calculator.
All you have to do is enter the numbers from your pattern and the calculator will give you instructions to get the amount of stitches you need.
And they'll be evenly spaced too!
At your leisure you can also learn how to figure it out manually as well. It's always good to know but if you like simple this is the best!
I use it all the time and it works like a charm!
Happy Knitting!
I am a participant in the Amazon Services LLC Associates Program, an affiliate advertising program designed to provide a means for sites to earn fees by advertising and linking to Amazon.com and affiliated sites. If you make a purchase through one of my links I may receive a small commission. This will not affect the purchase price and you will not pay more when you buy through my link.
Copyright © 2011 - 2026 by Vickie Danielsen All Rights Reserved
Please don't copy the content of this site. It is Copyscape protected
