- Home
- Knitting Instructions
- Knitting Cables
Knitting Cables For Beginners
Cable Knitting Tutorial For Beginners
Does the thought of knitting cables makes you feel a little nervous? They're kind of cool and everything but...
Me too! At least I used to think that way too. Then one day I grabbed some scrap yarn, sat down with a good knitting book showing me how to knit cables and I did it!
And it was really kind of fun and not difficult to do at all.
That's why I created this easy cable knitting tutorial for beginners so you'll learn how to knit cables too. Come on, you can do it, I promise!
I even updated this page to give you even more pictures to help you along.
It's time to move forward with your knitting and knitting cables is a great place to start. You're going to find out just how fun it is.
Then you can spend the winter knitting cable stitches because there so much fun! Well that's how I was for a little while...LOL
First, let's get a better understanding about cable knit stitches.
Cable knitting is done by crossing stitches over other stitches.

So all you're doing to knit a cable stitch is knitting stitches out of sequence.
Think of it this way, look at the next four stitches on your knitting needle - there's stitch 1, 2, 3 and 4.
Instead of knitting stitch 1 and 2 first you're going to knit stitch 3 and 4 first. Then you'll knit stitch 1 and 2.
The only reason you use a cable needle is to get stitches 1 and 2 out of the way.
The two pictures below show right slanting cables and left slanting cables. I've also included some explanations so you'll have a better understanding.
Knitting cable stitches that slant right look like this

When you hold the cable stitches in the back with your little U cable stitch holder, you will create cable stitches that slant to the right.
Common abbreviations for the right cross cable stitch are C4B or C4R and here's what it means:
- C for cable
- 4 is the number of stitches used in making the cable
- B means the stitches will be held at the back of work
- R means it's a right leaning cable stitch and stitches will be held at the back
Knitting Cable Stitches That Slant Left Look Like This
")
When you hold the cable needle in the front you will make cable stitches that slant to the left.
Common abbreviations for the left cross cable stitch C4F or C4L which means:
- C is for cable
- 4 is the number of stitches used to knit cable stitch
- F means it is to be held in the front
- L means it is to be held in the front and also it's a left slanting cable
Notes On Knitting Cable Stitches
This cable stitch knitting picture is pointing out the 4 stitches used to make a right slanting cable stitch which means 2 stitches are held in the back.
There's also a space in between each cable stitch you create, usually 2 or 3 purl stitches. With mine below there are 2 purl stitches.

1. The cable row is also known as the turning row just like in the picture above
2. Adding cable knit stitches to your knitting pattern will cause the fabric to pull in just like ribbing does.
And on that note the smaller cables like this one are great for adding to the cuffs of sleeves or the brim of a hat for added interest.
3. Make sure to add extra stitches to compensate if you do add some cable knit stitches and make sure to knit a gauge swatch too.
4. Knitting cables can be worked with a cable needle or without. There is a technique for knitting cables without a cable needle
5. Cable knitting is usually knit on the right side of your work
6. You don't usually knit cable stitches on every row. Usually there are a few rows of plain knitting before you work another cable row.
For example a basic 4-stitch cable will have 4 plain rows of knitting before the next cable row. You can add more rows in between if you want too.
Cable stitch knitting is usually knit on a Stockinette stitch background so that the cable stitch will stand out.
There are exceptions of course but this is the basic method.
Get your yarn and needles ready and let's start knitting cables. Don't forget your U cable stitch holder ready.
If you don't have the U stitch holder you may find that a bamboo cable needle or DPN(double pointed needle) will work. They aren't as slippery so the stitches won't slip off.
How To Knit A Cable Slanting Right, C4B, C4R
When you're knitting cables you usually need to knit a few preparatory rows.
Abbreviations: K, k, = knit, P, p, = purl, CN, cn = cable needle
These cables are worked over a multiple of 8 stitches
Cast on 24 stitches
Row 1: *K2, purl 4, k2, repeat from * across the row
Row 2: *P2, *knit 4, p2, repeat from * across row
Row 3: *K2, purl 4, k2, repeat from * across the row
Row 4 (Cable or turning row): P2, *Slip first 2 stitches purlwise to cable needle and place cable needle in back of work. Knit 2 stitches from left needle. Then knit stitches from the cable needle. Purl 2, repeat from * to the end of row.
I broke down row 4 into little steps just below to help
Steps to make a cable stitch: Purl 2 stitches first then we'll make a cable
- Slip first 2 stitches purlwise to cable needle
- Place cable needle in back of work
- Knit 2 stitches from left needle
- Some preparatory things in step 4
- knit the stitches from the cable needle
So let's break this down piece by piece. The cable you create will be made with 4 stitches and before every cable you will purl 2 stitches.
So purl 2 now and then proceed with the following cable instructions
Please note that the pictures are on top with instructions below

Step 1: Slip first 2 stitches purlwise to cable needle. With your cable stitch holder slip 2 stitches as if to purl onto your cable needle just like the photo above.

Step 2: Place cable needle in back of work. Here's my cable needle with the stitches hanging out at the back of my work.

Step 3: Knit 2 stitches from left needle.

Step 3 cont'd: Here are my 2 knitted stitches on my right needle

Step 4: First push the stitches on your left needle down a little bit so they don't slip while you tend to business just like you see on my left needle.
Now bring your cable needle up from the back just as I'm doing with mine above

Step 4 cont'd: Slide the 2 stitches slowly up the cable needle so that you can knit them just like my photo.

Step 5: Knit those 2 stitches off the cable needle and you're done knitting and creating your very first cable. Yay!

And there you have it!
In this photo there are 2 cables slanting right. The knit cables were made with 4 stitches and in between each set of 4 stitches are 2 purl stitches in.
How to Knit A Cable Slanting Left, C4F, C4L
Cast on 24 stitches
Row 1: *K2, p4,k2, repeat from * across row
Row 2: * P2, k4,p2, repeat from * across row
Row 3: *K2, purl 4, knit 2 Repeat from * across row .
Row 4: (Cable or turning row): P2, *Slip first 2 stitches purlwise to cable needle and hold in front of work. Knit 2 stitches from left needle. Then knit stitches from the cable needle. Purl 2, repeat from * to the end of row
The only difference in making your cable stitches slant to the left is where you place your cable needle.
My instructions are exactly the same as above only you will put your cable needle in the front of your work. So here we go....
Step 1: Slip first 2 stitches purlwise to cable needle. With your cable stitch holder slip 2 stitches as if to purl onto your cable needle just like the photo above.

Step 2: Place cable needle in front of your work. Here's my cable needle with the stitches hanging out in the front of my work.

Step 3: Knit two stitches from your left needle

Step 4: First push the stitches on your left needle down a little bit so they don't slip while you tend to business just like you see on my left needle.
Slowly lift your cable needle and gently slide the 2 stitches up so you can knit them.

Step 5: Knit the 2 stitches off your cable needle and your done!
Yay! I just knew you could knit cables!
So this is just one way to knit cables. You could make the cables at longer intervals in you want a different look.
All you need to do is knit more plain rows, rows like row 1 and 2 in my knitting instructions to lengthen the cable knitting intervals.
There are many ways to create your own style so play around and have fun knitting cables.
Holes After Knitting Cable Stitches Tip
Are there holes on the sides of your cables? There were with mine too.
Just loosen up the yarn a bit. All it means is that you are knitting cable stitches a little too tightly. And the more you try to tighten up the hole the bigger it will get.
You see when you're knitting cables the yarn gets really stretched and because it's being stretched it actually needs more yarn.
So again just loosen up your tension and the holes will go away.
Also I just want to mention that after building this page I discovered a better cable needle.
Well it's one that I like a lot. A U cable holder holds the stitches nicely. The stitches won't slip off this cable stitch holder.
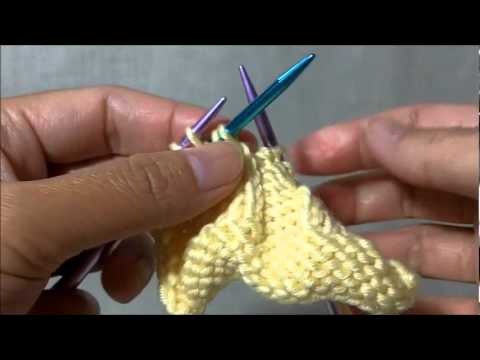
Basic Cable stitches Knitting Video
Looking for a video that will help you knit cable stitches? This is a very simple 4 stitches cable back video.
Hope this helps. Happy Knitting!
I am a participant in the Amazon Services LLC Associates Program, an affiliate advertising program designed to provide a means for sites to earn fees by advertising and linking to Amazon.com and affiliated sites. If you make a purchase through one of my links I may receive a small commission. This will not affect the purchase price and you will not pay more when you buy through my link.
Copyright © 2011 - 2026 by Vickie Danielsen All Rights Reserved
Please don't copy the content of this site. It is Copyscape protected
